When you’re making art as part of your magick-based spiritual practice you may need some supplies that transcend the mundane and invite the mystical into your artistic expression. Whether you’re an aspiring mage or a seasoned Art Witch wielding the brush, these tools can empower your creative magick. While this guide is not just for Witches, the difficulties inherent in including all the paths of the magick users would make this post an unreadable nightmare, please know that your path is included even though it may not be mentioned by name.
Introduction to Creative Magick:
In the space where art and Witchcraft converge, our creative magick toolkit becomes a key to entering this intersection of inspiration, intention, and manifestation. This is to help guide you to assembling the essential supplies that can elevate your artistic practice into a magickal craft, allowing you to create spells within your creative endeavors.
1. Brushes:
Your brushes can go beyond mere tools and become extensions of your intentions. Infuse them with the energy of your intention-setting rituals and they will serve as wands, channeling your magical will into every stroke. Remember to choose brushes made from ethically sourced materials to align your craft with the earth’s energy. Have you thought about using moon water in your paintings? Place lidded glass jars of water outside on the full moon to absorb the lunar energy and avoid contamination of the water.
2. Elemental Pigments:
Embrace the elemental forces with pigments that embody the essence of earth, air, fire, and water. Earthy ochres, airy blues, fiery reds, and watery aquas become vessels for elemental magic. Use these pigments to attune your creations to the natural forces that inspire and guide your artistic journey.
3. Moonlit Crystals:
Energize your creative space with moonlit crystals. Charge crystals under the full moon and place them in your studio to enhance the magical ambiance. Each crystal carries unique energies—amplifying creativity, promoting focus, or fostering emotional balance. Select crystals that resonate with your artistic goals and intentions.
4. Craft Your Own Enchanted Inks:
Dip your pen into enchanted inks that you’ve crafted to bring a touch of magic to your written and drawn spells. Made from botanical matter, these inks add an extra layer of intention to your creations. Experiment with different colors and scents to align your art with specific magical purposes, from manifestation to protection. There are two different recipes at the bottom.
5. Bespoke Sketchbook Grimoire:
Transform your sketchbook into a bespoke grimoire—an enchanted tome where your artistic and magical journeys intertwine. Dedicate pages to moon phases, planetary alignments, and personal spells. This grimoire becomes a reservoir of inspiration, a record of your magical experiments, and a reflection of your evolving craft.
6. Mystical Sigils and Symbols:
Incorporate mystical sigils and symbols into your artistic creations. Whether written on the margins of your canvas or woven seamlessly into your designs, these symbols amplify the magical intent of your work. Choose symbols that resonate with your personal practice or create your own to infuse your art with unique energy.
7. Elemental Altar:
Craft a miniature elemental altar within your creative space. Represent each element with small tokens—tiny bowls of salt for earth, incense for air, candles for fire, and a small bowl of water. This elemental altar serves as a focal point for grounding, inspiration, and calling upon the elemental energies to bless your artistic endeavors.
8. Magical Palette:
Imagine your palette like a mortar and pestle, blending pigments like potions. Charge your palette under the moonlight or clean and charge it with incense corresponding to your artistic goals. Your palette becomes a vessel for the magick potion that is your paint, turning each brushstroke into a spell cast upon the canvas.
Your Journey in Creative Magick
As you assemble your magickal artist’s toolkit, remember that each tool is a gateway to creativity and magick. Whether you’re painting, drawing, or sculpting, infusing your artistic practice with intention and ritual transforms your creations into potent spells. May your toolkit empower you to weave the threads of inspiration and magic into every artwork.
Recipes for Plant-Based Inks
Simple Berry Ink
Ingredients:
– 1 cup of berries (such as blackberries, blueberries, or raspberries)
– 1 tablespoon of vinegar
– 1 teaspoon of salt
– Water
Instructions:
1. Start by crushing the berries in a bowl using a spoon or fork until they release their juices.
2. Transfer the crushed berries to a small pot and add just enough water to cover them completely.
3. Bring the mixture to a gentle boil over medium heat, then reduce the heat and let it simmer for about 10-15 minutes.
4. Remove the pot from the heat and strain the liquid through a fine mesh sieve or cheesecloth to remove any solids. You should be left with a dark-colored liquid.
5. Stir in the vinegar and salt, which act as natural preservatives and help fix the color of the ink.
6. Allow the ink to cool completely before transferring it to a clean, airtight container for storage.
7. Your plant-based ink is now ready to use for writing or drawing!
Note: This ink may not have the same archival properties or intensity as commercial inks, but it’s an eco-friendly alternative for crafting or art projects. Experiment with different types of berries or other plant materials to achieve different colors and effects.
Archival Plant-Based Ink Recipe
Ingredients:
– 1 cup of oak galls or walnut hulls (for black ink)
– 1 tablespoon of gum arabic (as a binder)
– 1 teaspoon of iron sulfate (as a mordant)
– Distilled water
Instructions:
1. Start by preparing your plant material. If you’re using oak galls or walnut hulls, crush them into small pieces to increase surface area and extract more color.
2. Place the crushed plant material in a non-reactive pot and add enough distilled water to cover it completely. Bring the mixture to a gentle boil over medium heat.
3. Reduce the heat and let the mixture simmer for about an hour, stirring occasionally. This will extract the color and tannins from the plant material.
4. Strain the liquid through a fine mesh sieve or cheesecloth into a clean container to remove any solids. You should be left with a dark-colored liquid.
5. In a separate small bowl, dissolve the gum arabic in a small amount of distilled water to create a thick, sticky solution.
6. Slowly add the gum arabic solution to the strained ink, stirring continuously until well combined. This will help bind the ink and improve its flow and adherence to the paper.
7. In another small bowl, dissolve the iron sulfate in a small amount of distilled water. Add this solution to the ink gradually, stirring continuously, until you achieve the desired color and consistency. The iron sulfate acts as a mordant, helping to fix the color and increase its longevity.
8. Allow the ink to cool completely before transferring it to a clean, airtight container for storage.
9. Your archival-quality plant-based ink is now ready to use for writing or drawing!
Note: Store the ink in a cool, dark place away from direct sunlight to preserve its color and longevity. Use acid-free paper for best results, and avoid exposing the ink to moisture or humidity, as this can cause it to degrade over time. With proper care and storage, your archival plant-based ink can last for many years.
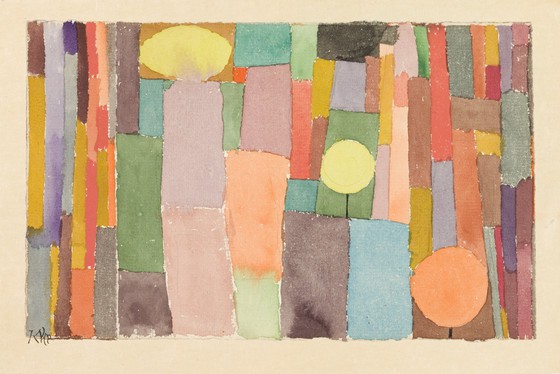
Call for Artists!
Paul Klee is just one of the artists who is presumed to be neurodiverse. Are you a neurospicy artist who would like your artwork featured in this blog? Let’s make this happen! Contact me!